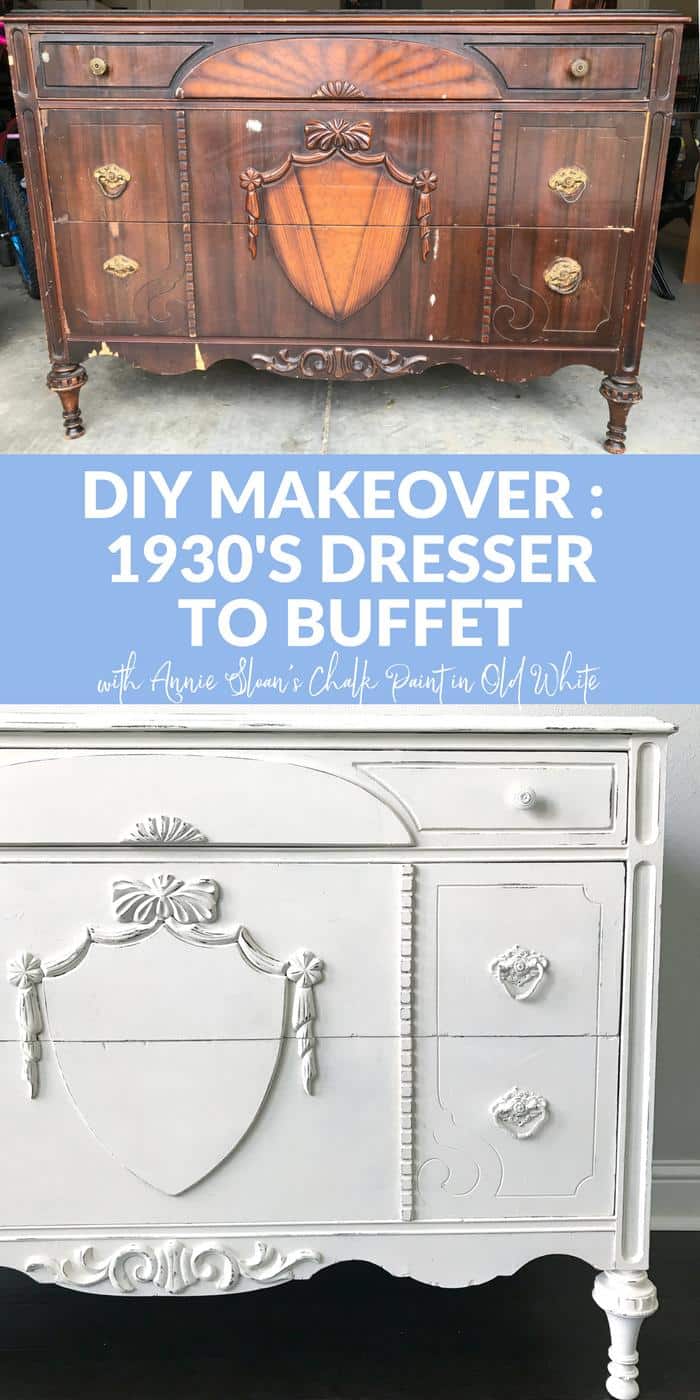
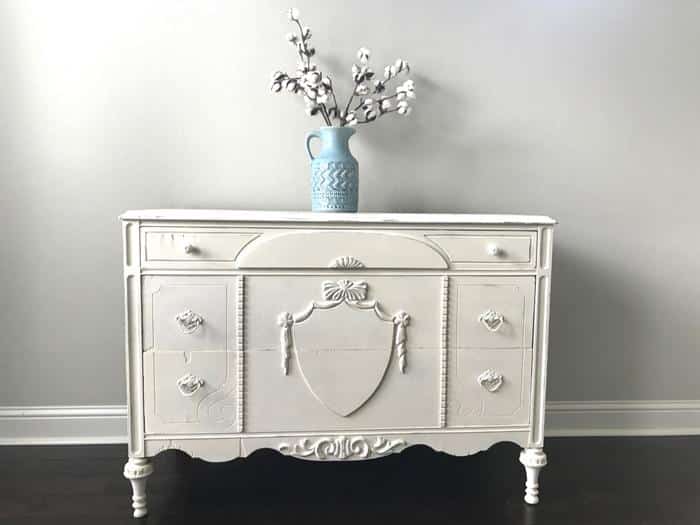
DIY Makeover | 1930’s Dresser to Buffet
By now you probably know that I’m a big fan of updating furniture. I would much rather repurpose something old (and buy it cheap) than spend big bucks on a brand new anything. There’s just something so satisfying about the work. I love looking at a piece in my home everyday and knowing that I brought it back to life.
I know some people are intimidated by tackling a project like this but I’m here to tell you that it’s not hard. It takes a little time (probably less than you think) and elbow grease. That’s it.
I’m so excited about the piece I’m sharing today.
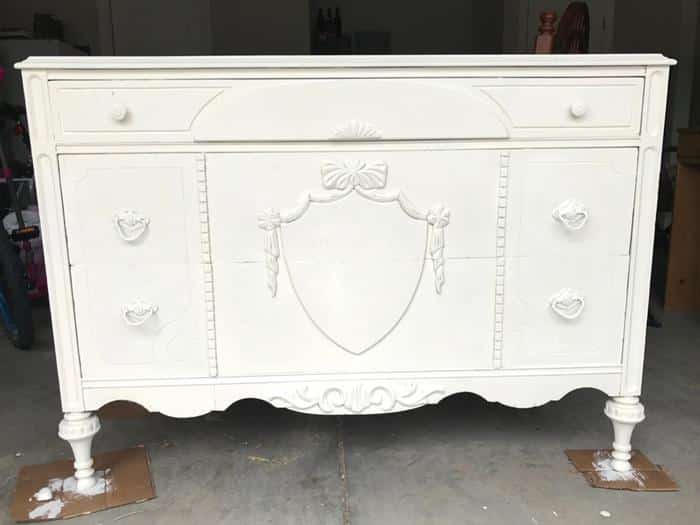
A few week’s ago my mom came for a visit to celebrate my son’s kindergarten graduation. Cue my waterworks. She brought with her several items from my parents’ storage unit including this 1930’s dresser. I took one look at it and I had big plans.
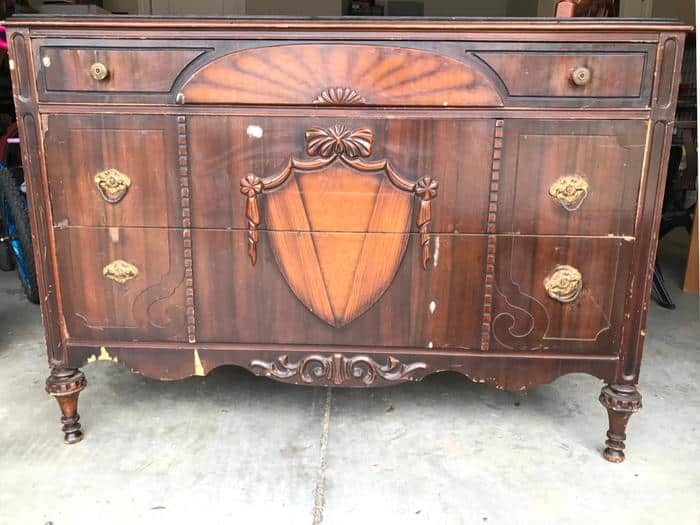
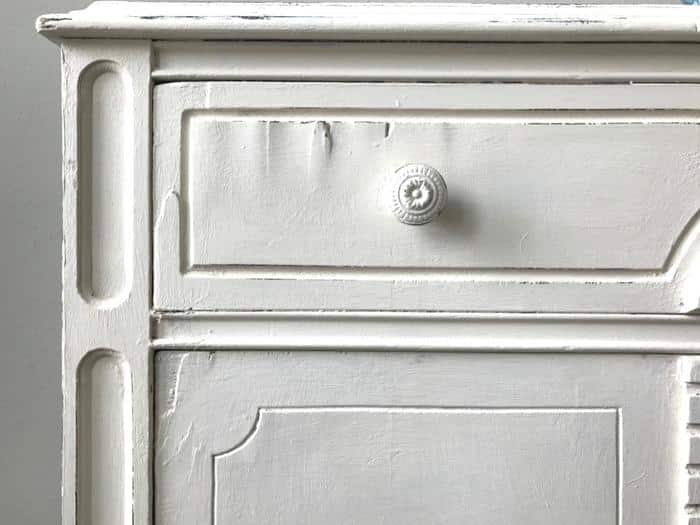
Yes, it’s obviously seen better days. But check out the beautiful detail.
The plan was to use it as a buffet in my dining room. For this project I selected Annie Sloan’s Chalk Paint in Old White (often my go to color choice).
There are lots of reasons why I prefer Annie Sloan’s but the big one is that it adheres really well without requiring that I sand anything first. Hallelujah. Let’s all get excited about that.
My first step was to quickly wipe down the dresser to remove any dust. This is the part where my three year old helps.
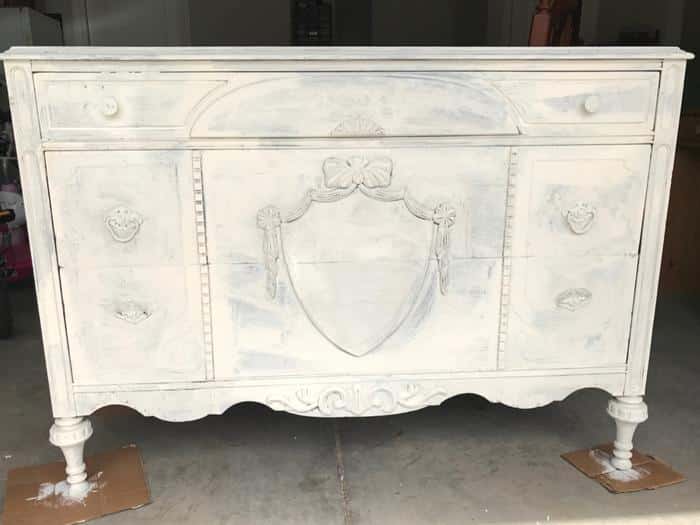
Then I applied a first coat of paint.
I do not paint the insides of the drawers. I like to keep things easy. Instead I pull them out and do a swipe of paint along the lip.
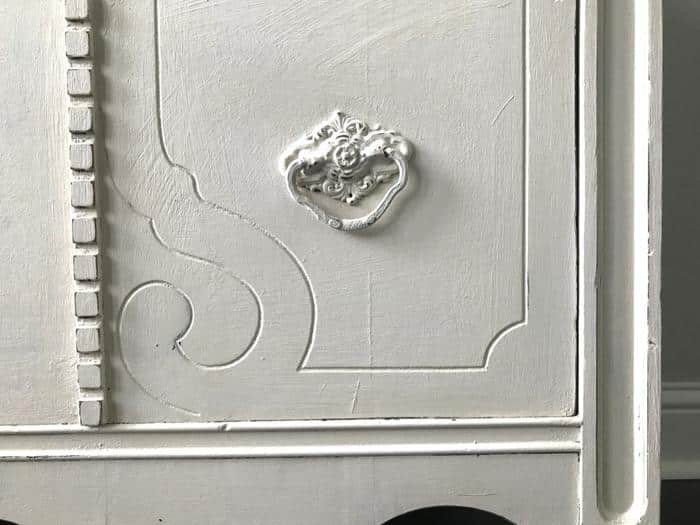
I also paint all knobs/handles.
A few minutes later (it dries fast) I applied my second coat.
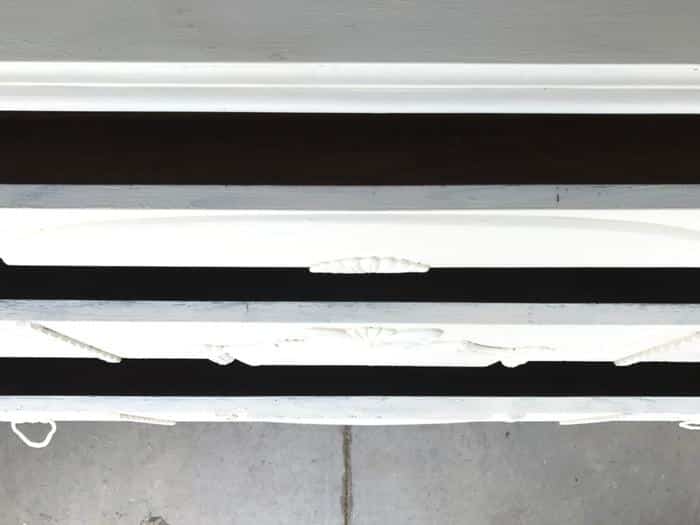
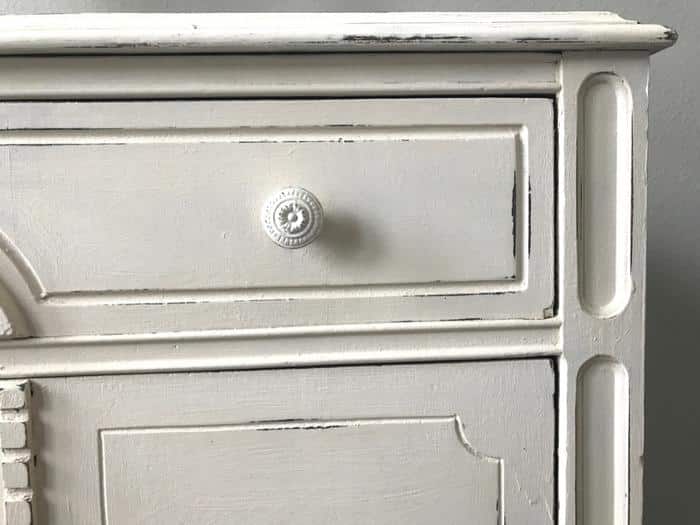
After two coats of paint you can really start to see the gorgeous detail, right?
I personally don’t want vintage pieces like this to look new so I prefer to do a bit of sanding wherever there are edges. I don’t sand every single edge. I just do it here and there until I’ve achieved the look I want. I use a piece of sanding paper that I’ve folded and get to work.
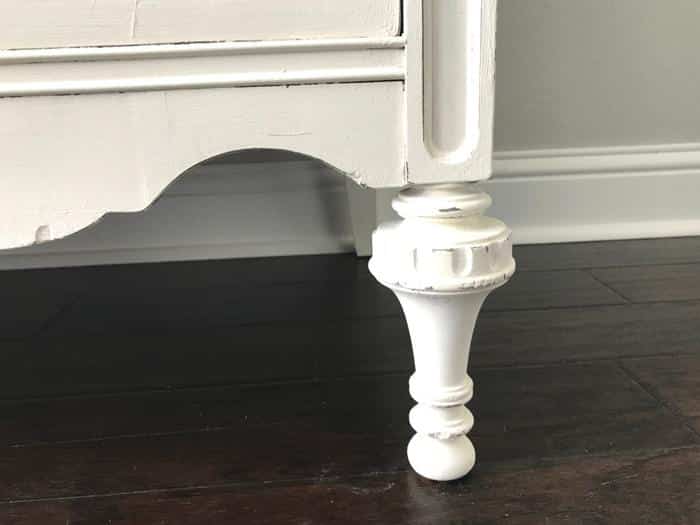
Because this is an older piece it’s full of imperfections. That’s part of it’s charm! I never repair any of that unless it’s preventing it from being structurally sound (like the bottom of the leg which I did have to glue back together). I just paint right over everything and call it a day.
Next I applied a thin coat of clear wax. You can use a brush or cloth for this. I prefer one of Annie Sloan’s brushes. They’re expensive but they clean up really well so I get lots of use out of them. I’ve had one of my brushes for almost 4 years and it still works great. I can’t say that about any other brand of paint brush.
The final step is to use a clean dry cloth to buff excess wax off. Basically I just give the dresser a light wipe. I’m not trying to remove all the wax. I just want to remove any extra in case I got a bit heavy handed somewhere.
I think the finished product is exquisite and the entire project from start to finish took only one afternoon. Well worth it.

2 Comments on “DIY Makeover | 1930’s Dresser to Buffet”
It looks beautiful!
Wow! What a beautiful job. I agree with you – I’d much rather re purpose something that I already have and fix it up than go out an purchase something new. I just need to work on my furniture painting and refurbishing skills.